Tuesday, October 14, 2014

Calibrating the perilstatic pump

 So I received the pumps ordered on Taobao. As many forums gave various feedback on these pumps I decided to calibrate them.

In fact, for the experience, I added a cooking scale under the receiving tank and measure the water weight... as 1cc = 1 gram, it is quite easy to measure !

I ran some tests and finally, 60s equal 30cc. Easy, eh ?

To drive the pump, it is quite easy: a single TIP120, a 1K to 3.3K resistor and a power supply. Schematics & explanation can be found here.


Using a simple diagram to drive them with the Arduino, I ran the pump for a minute and measure the amount of water that have been moved from one container to another.

Saturday, October 4, 2014

Structure modifications

The first modifications were to replace the clear tube between the Trofast boxes.
Instead of a direct drop to the next bucket, I used a 15mm PVC tube with a interconnect. The interconnect has a threaded male part than goes thru the Trofast, and we screw the female part on top of it. The height of that female part is perfect as the water level is just in contact of the netpots bottom.


The bottom of each dropdown tube is glued with hotglue gun and I drilled 6 holes to make some kind of shower head. The tube is just plugged into the interconnect.

Under the dropdown tube, I now have a bell with holes to prevent clay pebble to enter the tube and get stuck at the bottom. As they are bigger than the holes, the flow was restricted and I had the installation flooding the balcony.
You need a lot of holes, and they have to be under the water level. Drill also the top of the bell otherwise the syphon effect will empty the whole bucket.
I've also added more shelves on the right side. But they are not running yet.
As the tomatoes need more heights I can now leave them on the right side and have some room for the leaves.
 After a few weeks, I had a algae invasion, all the clear aquarium tubes became coated with green and the tank turned green. So I filtered the water and removed the clear tubes.


I now use the frame PVC tube to feed the water to the top, so I added a T near the tank, with a treaded adapter and a water hose brass male plug. The aquarium pump is now feeding the system thru a 30cm soft tube and then it goes to the top in the PVC frame.

Sunday, September 7, 2014

Seedlings !

Ok, we got the structure almost done, the water pump is in the bottom tote, and the air pump is tied to the frame, so it is time for something to grow ! As I wanted to start from seeds, I bought some CocoPods. These are compressed Coco discs that expand in the water.

Check my friend's website to see how to handle lettuce seeds as they are tiny tiny.

 The 2-3 first days, it is better to hide the seedlings from light. The lid is great as it keeps the humidity level high (it is quite rare to have super dry weather here in Hong Kong anyhow).
When the seedling are well developped, and the roots are going thru the pods/foam, they are ready to transplant in the netpots.
Seeds don't grow at the same speed, so transplant only the viable ones...
The Typhoon killed my first batch by bending the stems...

Saturday, September 6, 2014

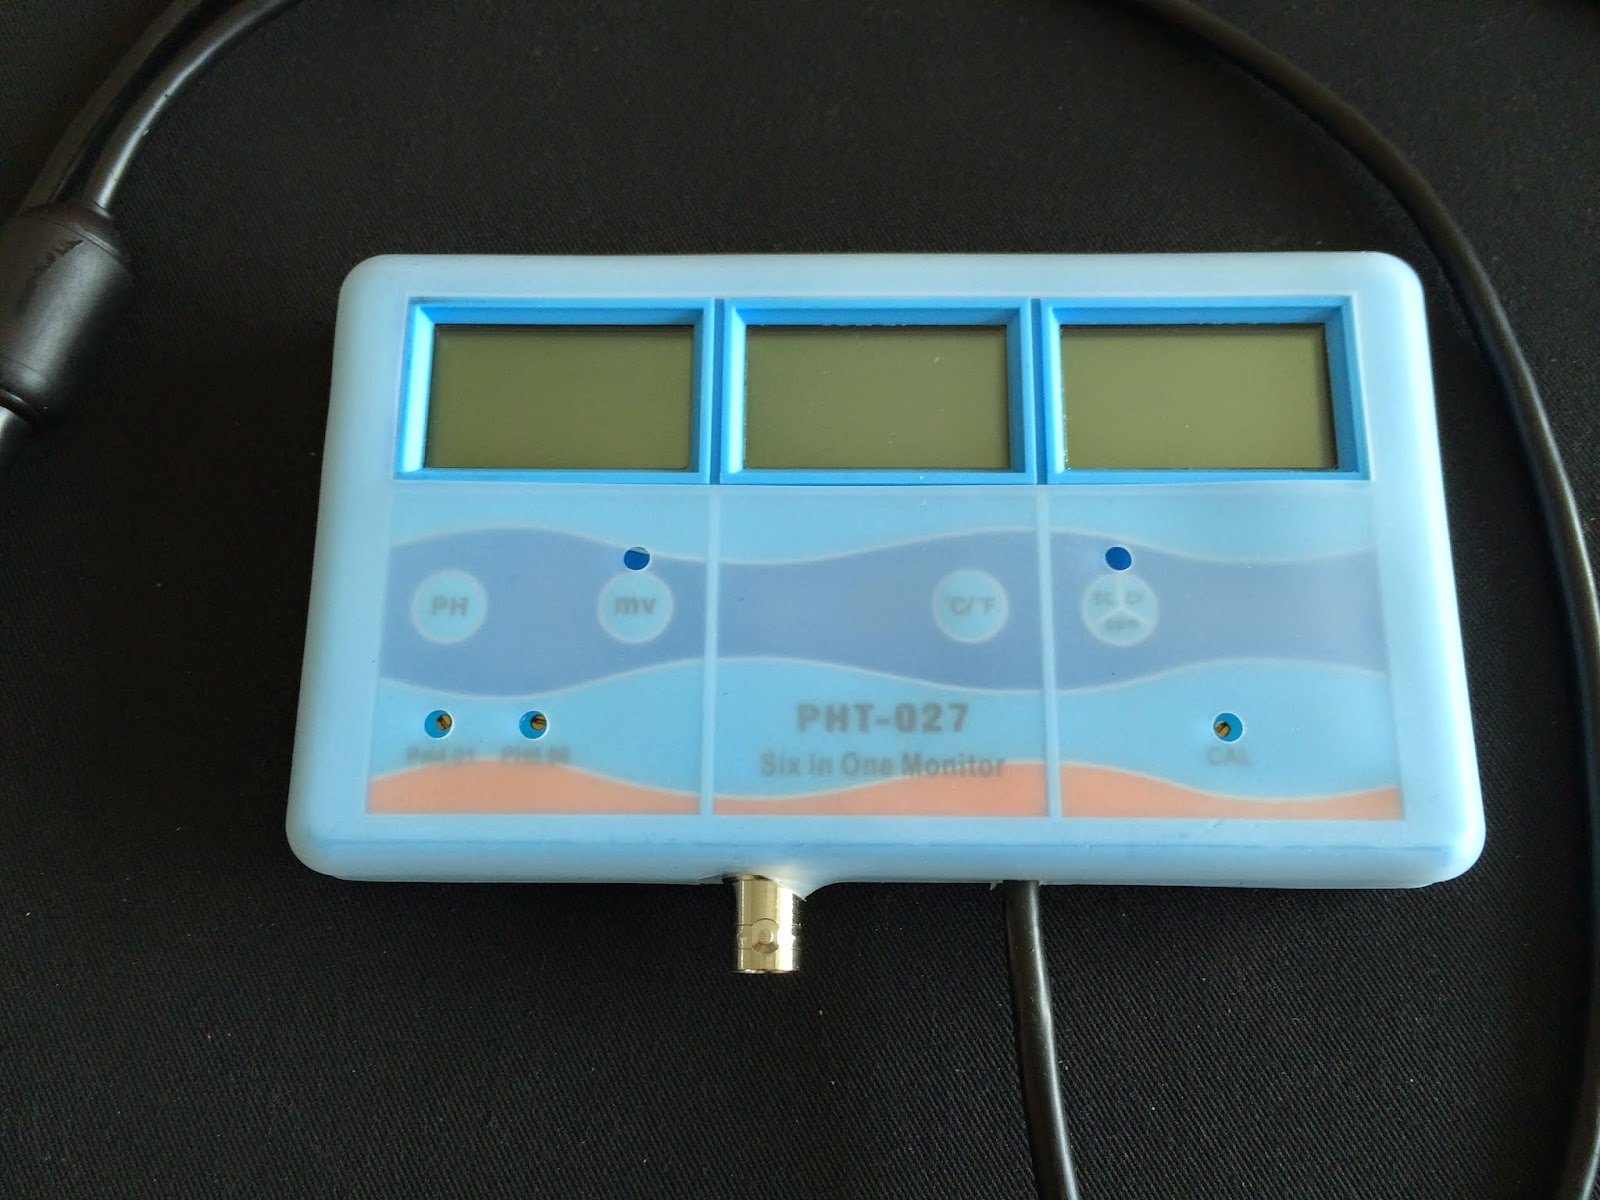
7-in-1 water meter... that displays only 3 parameters !

After some research on AliExpress & Taobao for some pH & EC meters, I finally found a unit that was quite cheap and provided pH, EC & Temperature reading. 

I even found a voucher to get 5% on their "original" website


The unit is quite compact and is delivered with an ORP probe, but as there's only one BNC socket, it is either pH or ORP...

And we can't count °F & °C as different features.

Wednesday, September 3, 2014

The structure

 Instead of using a wood plank and a shelve system from IKEA, I decided to go with a PVC tube frame. We have plenty of little hardware stores in Hong Kong, so sourcing the PVC tubes are easy and close to your home.
You can see on that picture that I have a clear white storage tank... that will help to develop algae :( Black is the way to go.

The only tools you need are a tape meter and a saw.

As the green tote is 42 x 30 x 10, the front bars are 40cm and they are made of 1/2" tubes... The side tubes are 26cm. Now I realised that I should have used 25mm tubes, as metric tubes are easier to source than imperial. 4 Ts per  shelf, 4 Ts for the base, and another set of 4 Ts for a link between the front and the back ladder to keep the structure together.


I found the PVC frame easier to modify and adapt to your needs. For exemple, I started with a single column, and then I thought that I needed an area to put my seedlings, then I added one shelf, and just cut the tubes of the existing frame, and put two T... Voilà !

You'll need tube caps for the feet. Elbows (L) are just for aesthetics...